yuux
Co-founder of DropReference, I'm here to give you the best tips to build the gaming PC of your dreams!
yuux
Co-founder of DropReference, I'm here to give you the best tips to build the gaming PC of your dreams!
We compiled over 10 different sources to bring you the 30 most useful tips from Crimson Desert. Combat, cooking, exploration, money: everything is covered.
Crimson Desert is the kind of game that throws 200 mechanics at you without really explaining how they work. You can easily spend 30 hours without knowing that a dog can loot for you or that clear soup is the best heal in the game. We have sifted through more than 10 different sources — including PCGamer , Games.gg , PowerPyx , Gameblog , TheGamer , GameSpot and several video guides — to give you this compilation of 30 tips. The goal: for you to waste less time struggling than we did.
Yes, it's a bit like the Assassin's Creed tower but in a medieval version. When you arrive in a new area, look for the bell tower and ring the bell. You unlock the map of the region all at once with all the points of interest. Without that, you're exploring blindly — and the map is huge.
The Blinding Flash isn't just a combat gadget. Climb up, activate it, and look into the distance: you'll see bright flashes indicating fast travel points, sealed Abyssal Artifacts, and other secrets. It's also the best way to spot destructible vegetation that hides passages—like vines blocking an access. In short, make a habit of drawing it often during exploration.
You will see large circles with a "?" on the map. They hide either a Abyss Nexus (no fast travel point), which is a puzzle that gives you an Abyssal Artifact as a reward. Both are crucial. And the pillars that appear after solving a puzzle also serve as teleportation points. So every "?" solved is potentially a double gain.
 Click to enlarge
We know, the temptation to explore everywhere is strong. But the game unlocks its mechanics gradually through the main quest. Before chapter 5, you don't even have access to a good part of the side content. If you really want to enjoy the open world without getting stuck every 5 minutes, push the story first. Exploration will still be there afterwards — and much more enjoyable with all the mechanics unlocked.
You won't have a fast travel point near the camp for a while. The trick is to open the map, place a marker on the camp, then switch to the Abyss layer. Teleport to the nearest Nexus in the sky, jump, and dive in Superman mode towards your camp. Deploy your wings just before hitting the ground. Fast, stylish, effective.
If you accidentally fall from the Abyss or find yourself stuck in the scenery (it happens), use the Axiom Force to stop your fall, then go to the "Others" menu and choose "Escape". You will be teleported to the last stable place. It also works for classic terrain bugs - it saves you from having to reload.
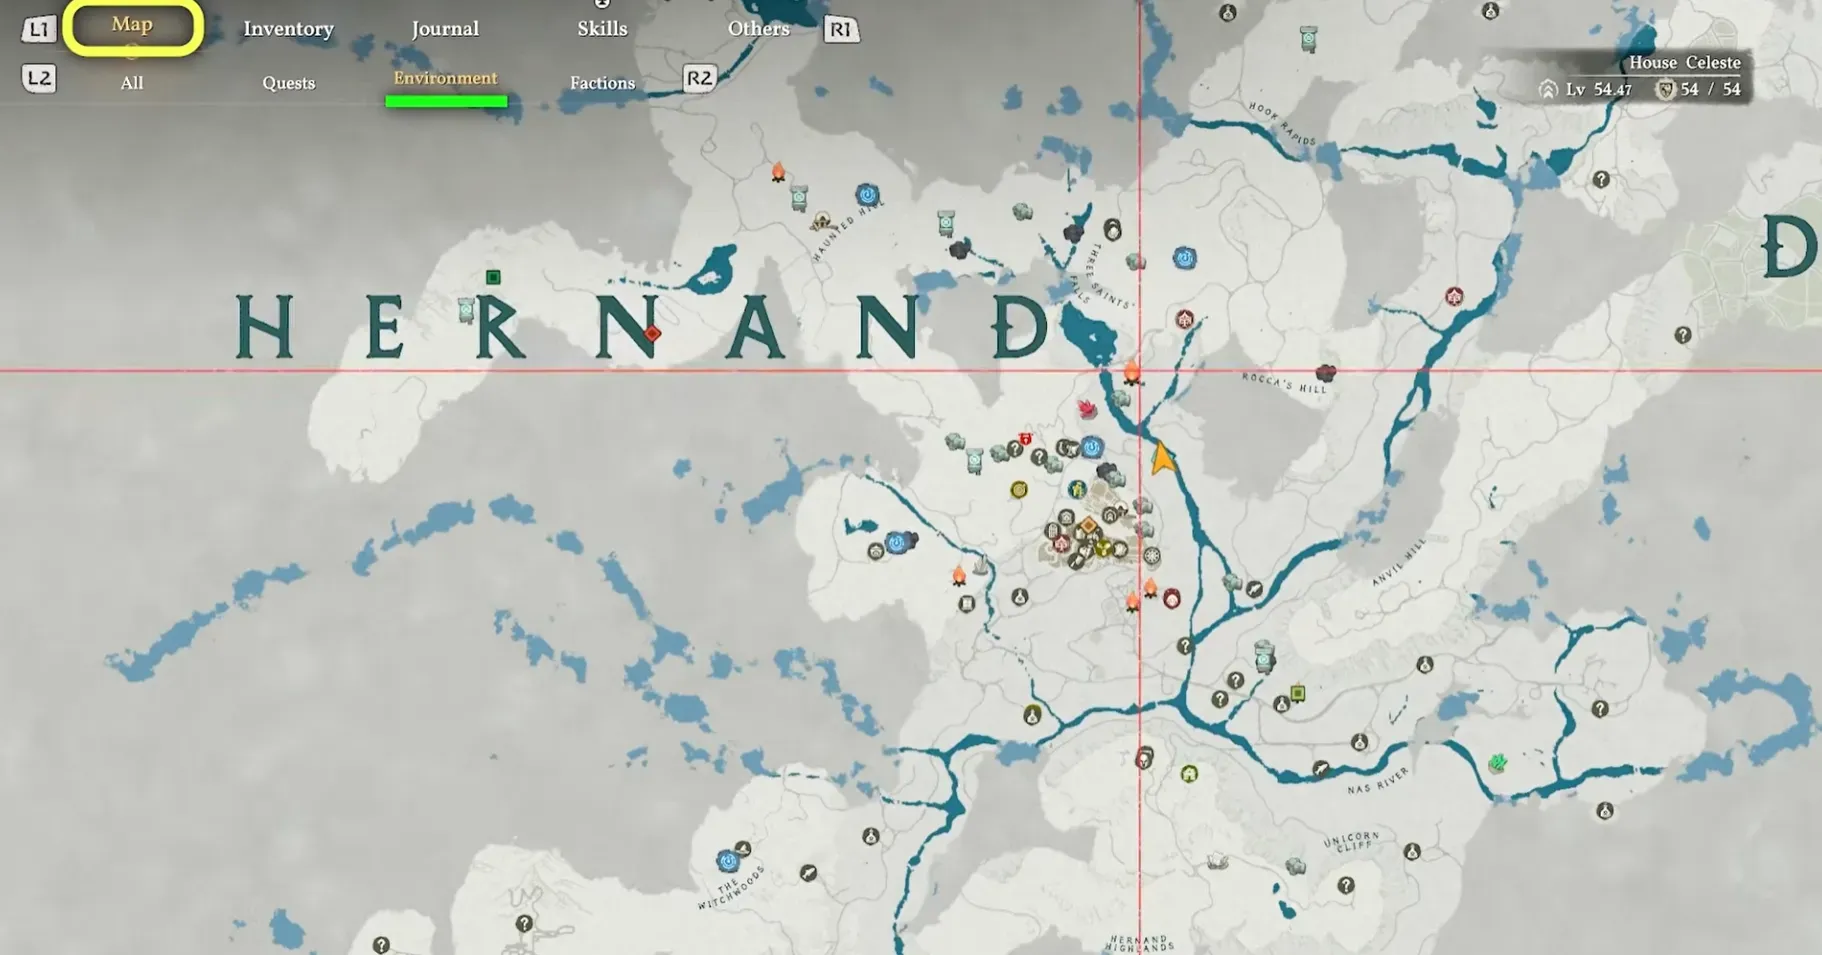
The map has multiple display layers. By default, you see everything — it's a mess. Switch to the "Environment" view to make merchants, witches, and ore veins appear much clearer, especially when you zoom out. The veins reappear approximately every 7 in-game days after being mined, so mentally note where they are.
Whether you're struggling with a puzzle or a boss, Force Palm probably has the answer. Level 3 sends out a shockwave that destroys entire herds of animals when hunting, and applies a massive stun to bosses. It's also useful for exploration to push blocks or shatter certain minerals impossible to mine with a pickaxe.
L3+R3 on the controller, X on the keyboard. The game slows down, you regenerate spirit much faster, and you have a safe window to eat and heal. Even at base level, it's essential. But the real game changer is at level 2: you can press R1 (or left click) to push back all enemies around you. And if you're already getting beaten up, simply press L3+R3 again: the repulsion triggers automatically. At level 3, Kliff tracks incoming attacks in Focus and allows you to counter them with L1. Invest your Artifacts in this early.
One thing the game doesn't clearly explain: if you hold the light or heavy attack button instead of spamming, Kliff automatically chains the entire combo. And it's not just for comfort - the combos are faster, smoother, and the damage increases with each hit in the chain. Most basic enemies die in 2-3 hits like this.
Sprint + F (Y on controller) = a kick in the face that knocks the enemy to the ground. It works on humanoids, bandits, and even some bosses. Underestimated, but formidable. You can also unlock wrestling abilities in the skill tree, like the clothesline, which is quite satisfying to use.
Hold L1 to block, then without releasing, also hold R2. Kliff does a shield bash, followed by a charge, then a heavy 3-hit combo. On the keyboard, it's Ctrl + right click, both held. This combo is safe because you remain in guard for a good part of the animation, and the damage is hefty. It's the perfect response when you're being swarmed by a group of bandits and don't know where to start.
When you kill an enemy, those around him are briefly stunned - often even knocked down. The trap is to play defensively and wait for openings. In Crimson Desert, it's the opposite: be aggressive, get a kill, and the chain reaction does the rest. You rush to the next one, finish him, the others are stunned again. When it overflows, Focus blast. Rinse and repeat.
Holding Ctrl (LB) in combat allows you to lock onto an enemy and block. If you press at the exact moment of impact, you perform a parry. But it's at Level 2 that it becomes interesting: you get an improved dodge, like a "perfect dodge" that makes evasion much easier at the last moment. The Level 3 adds Encounter, which interrupts an enemy attack if you attack just before being hit. Top priority in the skill tree.
Some skills in the tree are marked "observe this skill in action to learn it." Basically, you just need to see a boss or a specific enemy execute this attack several times, and you unlock it for free. No need for an Abyssal Artifact. Focus is perfect for this: slow down time and watch closely what the boss does.
L1+R1 (Ctrl + left click) to blind the enemy with a flash, then immediately follow up with the Blinding Flash Finisher for easy and guaranteed damage. This is one of the most profitable combos in the early game, especially against slightly tough enemies who are not easily stunned.
The Stab skill applies a bleeding effect that deals damage over time. On bosses with large health bars, these passive damages accumulate quickly. It's particularly useful in the early game when your raw damage is still low. Combine this with Turning Slash — which has invincibility frames and hits multiple enemies — and you have a solid kit from the first hours.
Endurance is what determines how much you can block, attack, and sprint before collapsing. In the early game, 3-4 levels of endurance make a huge difference on bosses. Health, 2-3 levels to avoid dying in two hits. And spirit, 2-3 levels as well to power Force Palm and Turning Slash. These three nodes come before flashy skills.
Small important detail: the lines connecting the skills in the tree don't mean anything. You can unlock any node in any order you want, unless the description explicitly says that a prerequisite is required. Ignore the lines.
In Crimson Desert, there are no healing potions. Food is your only source of healing. And bosses require you to have dozens of them on you. We're not exaggerating: 30 soups and 50 steaks in your inventory is the norm for tough battles.
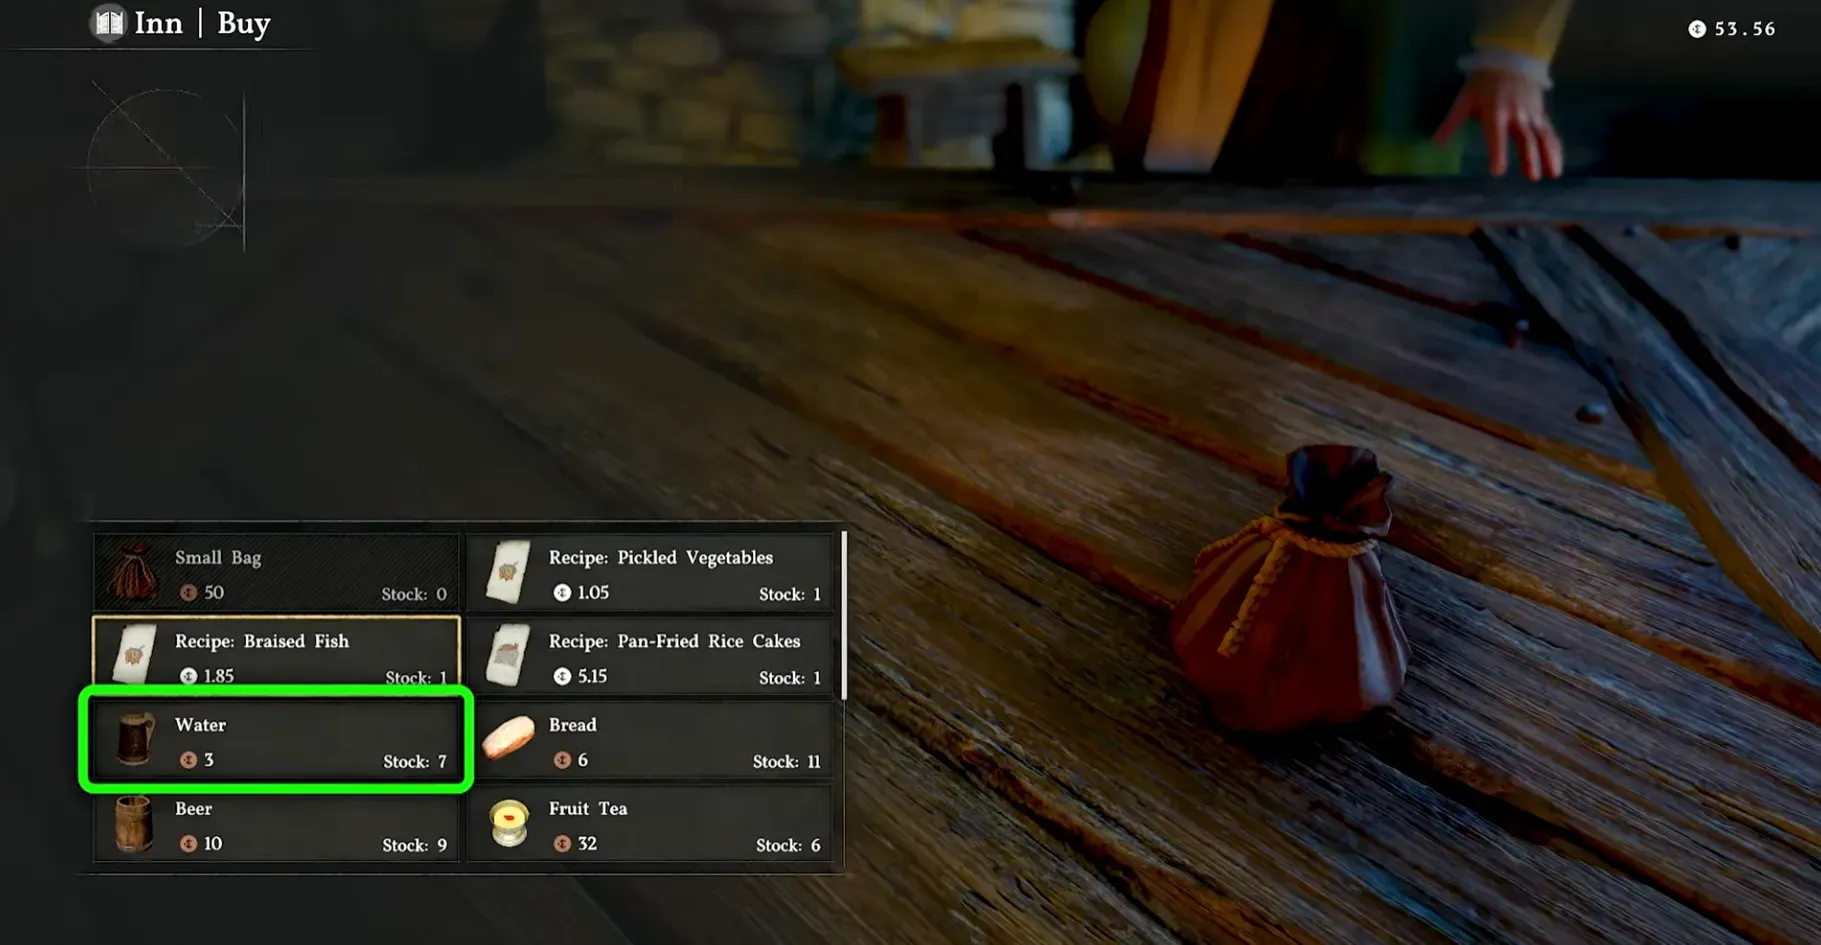
You unlock the Clear Soup recipe at the beginning of Act 3. The basic version restores 180 HP and is made with ingredients bought from merchants. Forget about the "thick" or "invigorating" versions — they cost much more in resources for a gain that's not worth it at the start of the game. The basic clear soup is the sweet spot.
Here is the optimal circuit we found to fill up on food in a few minutes:
Merchants' stocks regenerate every in-game day. Do this circuit regularly and you will never run out.
 Click to enlarge
Why? Because grilled bird meat doesn't stack with regular grilled meat in the inventory. It takes up an additional slot for nothing. By first using the bird meat in soup (which stacks normally), then the rest of the meat to make classic grilled steaks, you optimize your inventory. Yes, it's micro-management. But when you have a total of 12 slots, every space counts.
 Click to enlarge
Press F3 (right D-pad on controller) to open the consumables wheel and assign your favorite food to the bottom left slot. In the middle of a boss fight, you don't want to waste 10 seconds searching through your menus. One press and you eat. Simple, vital.
These small shiny beads are found everywhere during the story quests. When you die with a Palmar Pill on you, you can come back with 30% HP instead of having to restart the boss from the beginning. Let's just say it's a free second chance. Keep an eye out in the corridors and corners, they are easy to miss.
Almost all game merchants sell a small bag as a one-time purchase that unlocks an additional inventory slot. It's cheap and permanent. Given the scarcity of space in this game - seriously, the inventory is tiny - buy them all as soon as you see them. Merchants in other regions also have them, so keep checking as you progress.
The Requests, these mini-missions that we find on bulletin boards or directly from NPCs. They are often very short - cutting wood for Turnali, mining ore for Rhett, cooking for Renée - and earn you a medium bag with 3 inventory slots. As a bonus, you gain +50 trust with the NPC in question. And trust, we'll talk about it right after, it's not cosmetic.
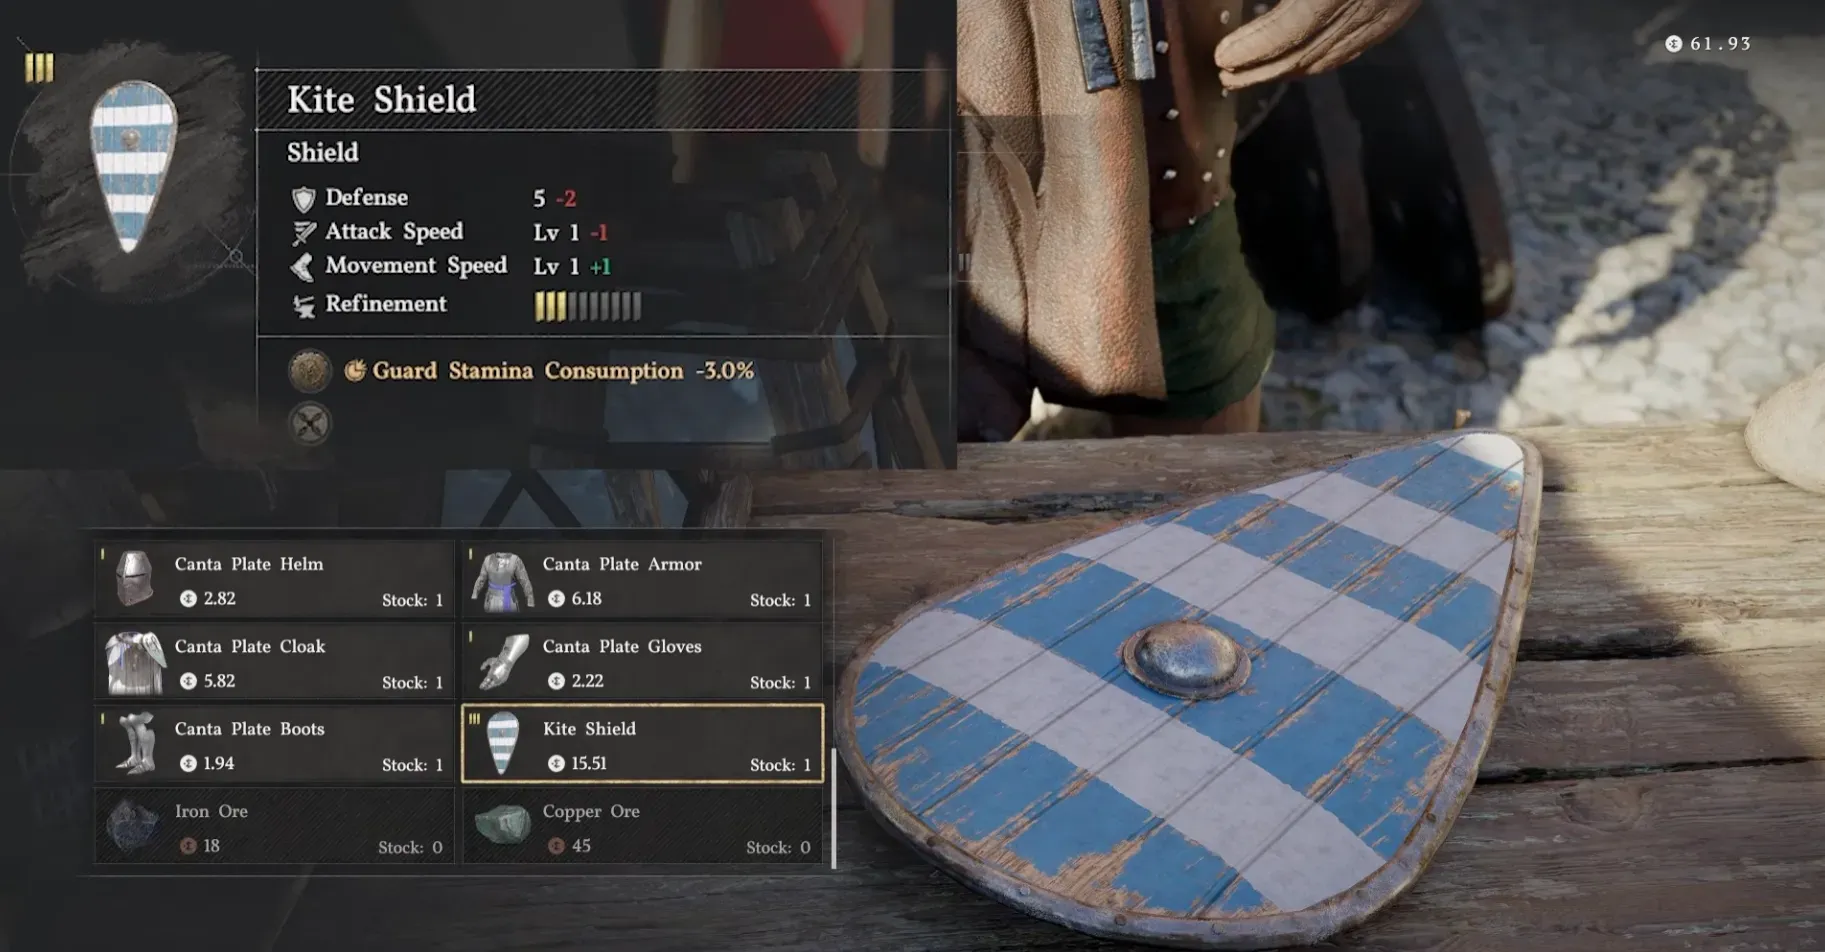
Every day in-game, you can interact with an NPC to gain +5 trust (5 interactions max = +25/day). At 100 trust, the merchant offers you exclusive items and their stock regenerates daily with additional resources. Hernand's equipment store, for example, sells a kite shield with a special socket "reducing guard's endurance cost" once at 100 trust. It's worth getting involved.
 Click to enlarge
Select an item and press L3 (T on the keyboard) to group similar items into a category. It doesn't free up slots per se, but it cleans up the interface and you'll find things 10 times better. Do it for your food, your materials, everything. And items with a purple background? They don't take up a slot, so don't panic.
The recipes and documents you have already read can be sold - some recipes are worth a good amount of copper. The same goes for completed bounty posters: they take up one slot each and can be resold for 10 copper each. It's not much, but the freed-up slot is valuable.
Yes, you can. All you need is a mask (common drop from bandits) and a generic key (you'll find one while exploring). Enter through the main door of the bank, open the door on your left with the key, collect everything, exit, and go sell to a merchant. If the guards get angry, run out of the red zone. And if you have a bounty on your head after, go to the church to be absolved. 75 silver in 2 minutes, can't refuse that at the beginning of the game.
Be careful though: stealing reduces your Contribution, whether you get caught or not. And Contribution is the currency used to buy good equipment at the Contribution shop. So steal in moderation if you want to keep access to the best items.
The pink icons on the mini-map indicate bounty posters. Inspect them to add the quest to your map. The catch is that you have to bring the prisoners back to the prison each time, and you can't use fast travel while carrying them. But there's a trick: grab your first target, load them onto your horse's back, then go get the second one and carry them yourself. Two bounties in one trip. It makes up for the travel.
When you loot copper or silver purses, the money is not added automatically. You have to open your inventory and "use" the purse to retrieve the coins. If you're wondering why you're always broke even though you loot everything that moves, that's probably why.
Each unique weapon and armor you find can be upgraded at Hernand's blacksmith. The first 4 levels cost just copper and iron — no Abyssal Artifact. And these first levels already provide a significant stat boost. Level 5 requires an Artifact, so it is recommended to stop at 4 for now and save your Artifacts for skills.
Buy crafting materials (ore, leather, small bones) from every merchant you come across. It's cheap and will save you from farming sessions. Weapons use ore, armors use leather or ore depending on the type, and accessories use small bones. If you find a duplicate of an item, you can use it as an enhancement material instead.
 Click to enlarge
Next to the blacksmith (and in other places in the world), you will find grindstones and anvils. Interact with them to sharpen your weapons or reinforce your armor — it triggers a small cinematic and you leave with bonus damage or defense for a while. Incorporate this into your routine every time you pass through Hernand. It's free and it can make a difference on a tough boss.
The equipment itself does not make a huge difference in Crimson Desert — it's almost cosmetic. What really makes you stronger are the Abyss Cores : mods that you slot into your gear to boost your stats. You can craft and upgrade them at the first witch you encounter through the main quest. Level them up to tier 3, that's the sweet spot. Tier 4 is stronger but has a durability mechanic - basically, it's temporary. Not great. The leather helmet of the Fallen Kingdom (the Staglord helmet) comes with a core that boosts Turning Slash damage by 35%. One of the best cores in the early game.
Little tip on helmets: plate helmets prevent you from wearing masks, earrings, and glasses at the same time. Unless you want to do without these accessories (and the ability to fly), stick to a lightweight helmet.
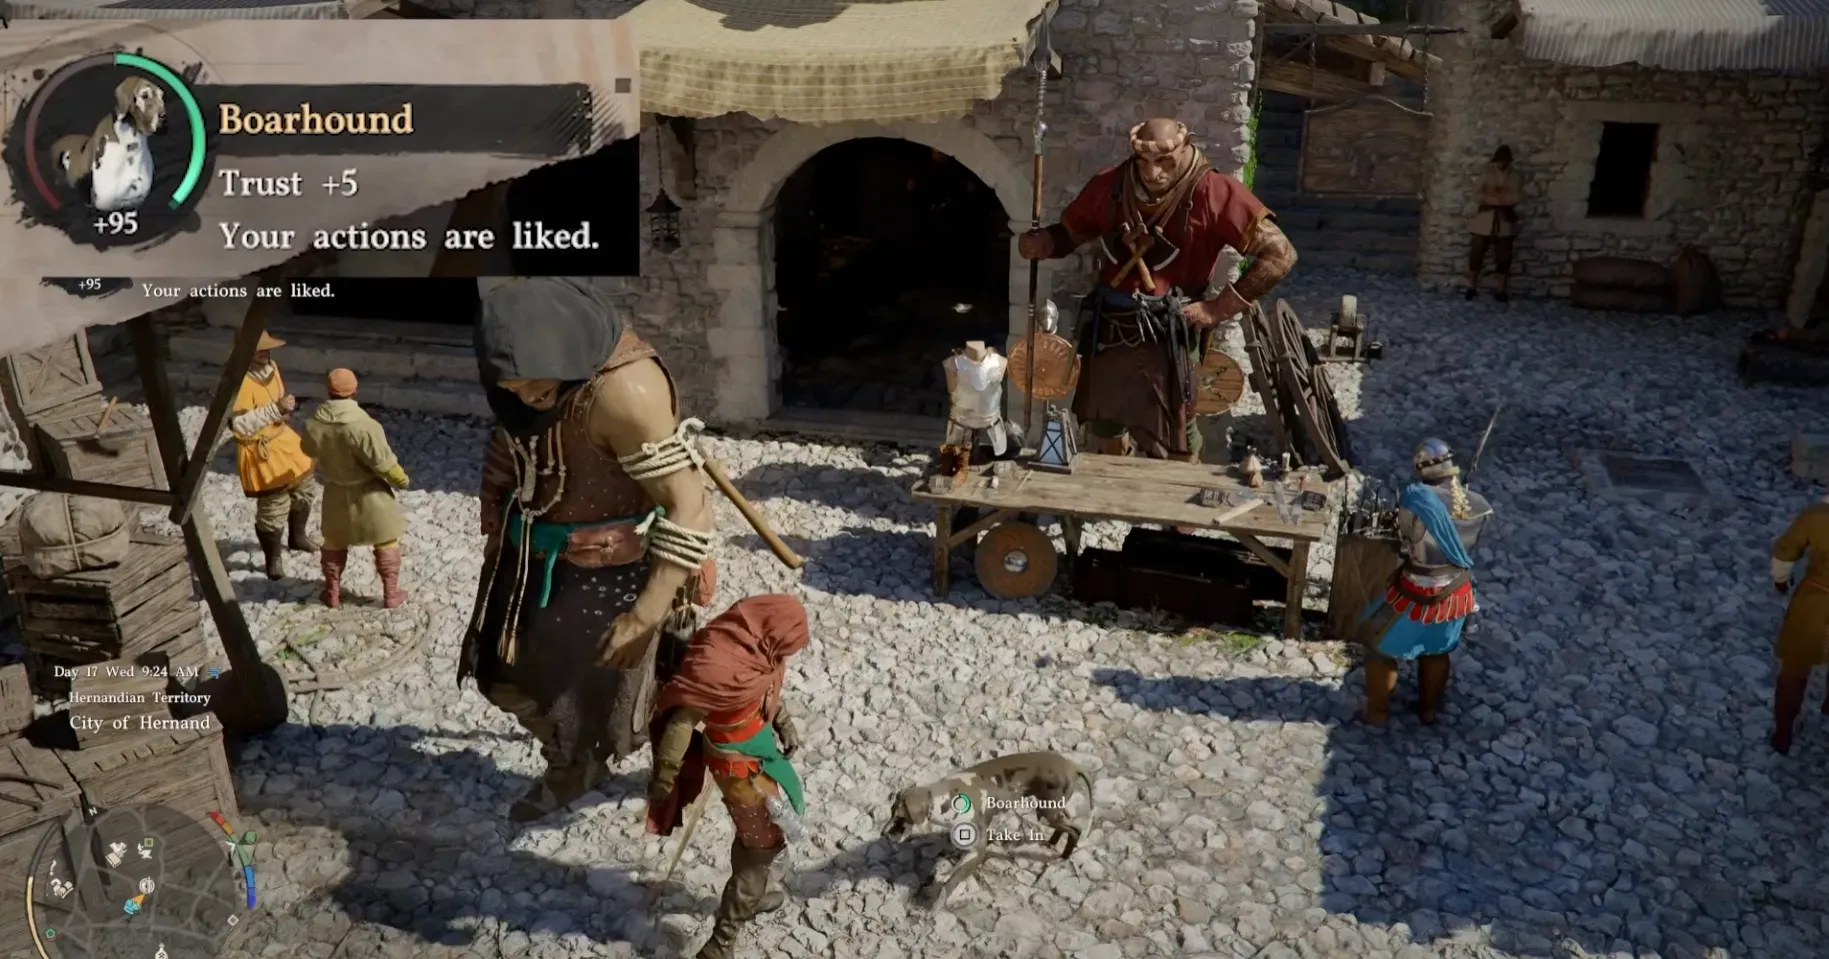
Pet any dog or cat you come across, 5 times a day in-game, for +25 trust. For dogs, you can also give them raw meat 3 times a day to go even faster. At 100 trust, the animal becomes your companion. Summon it via the menu and it will follow you everywhere to pick up loot for you. A monstrous time saver after each battle.
There is a dog and a cat in the main square of Hernand. Start petting them as soon as possible. If your favorite animal is not in its place on a given day, come back the next day in-game — you can speed up time by sleeping in a bed.
 Click to enlarge
Your horse has a leveling system. Stroke it, give it hay (in the inventory menu or by throwing it on the ground), and ride it to accumulate experience. By leveling up, it unlocks new skills — including the double jump, like Torrent in Elden Ring. And if your horse is on the ground, no need for a stimulant or to go to the stables: a good hit of Force Palm: Healing puts it back on its feet. Yes, you heal your horse by hitting it. The game is like that.
If you see an object in a merchant's shop (physically in the scenery), use Ctrl (LB) to take a closer look and check if there is a "buy" option. There are often items that you can buy directly like this, but that do not appear in the seller's inventory when you open the classic purchase menu. A trick that 90% of players miss.
103 Listed Products
Starting at
280€
Starting at
280€
76 Listed Products
Starting at
1,165€
Starting at
1,165€

72 Listed Products
Starting at
296€
Starting at
296€

70 Listed Products
Starting at
569€
Starting at
569€
61 Listed Products
Starting at
897€
Starting at
897€
47 Listed Products
Starting at
190€
Starting at
190€
47 Listed Products
Starting at
317€
Starting at
317€
46 Listed Products
Starting at
649€
Starting at
649€

38 Listed Products
Starting at
550€
Starting at
550€

35 Listed Products
Starting at
269€
Starting at
269€
28 Listed Products
Starting at
3,915€
Starting at
3,915€
27 Listed Products
Starting at
349€
Starting at
349€
23 Listed Products
Starting at
620€
Starting at
620€
22 Listed Products
Starting at
428€
Starting at
428€
19 Listed Products
Starting at
441€
Starting at
441€
16 Listed Products
Starting at
341€
Starting at
341€
16 Listed Products
Starting at
1,880€
Starting at
1,880€
15 Listed Products
Starting at
896€
Starting at
896€
15 Listed Products
Starting at
628€
Starting at
628€
15 Listed Products
Starting at
298€
Starting at
298€
13 Listed Products
Starting at
240€
Starting at
240€
12 Listed Products
Starting at
168€
Starting at
168€

11 Listed Products
Starting at
585€
Starting at
585€
10 Listed Products
Starting at
239€
Starting at
239€
10 Listed Products
Starting at
366€
Starting at
366€

9 Listed Products
Starting at
599€
Starting at
599€
8 Listed Products
Starting at
683€
Starting at
683€
8 Listed Products
Starting at
230€
Starting at
230€

8 Listed Products
Starting at
1,590€
Starting at
1,590€
8 Listed Products
Starting at
439€
Starting at
439€

8 Listed Products
Starting at
990€
Starting at
990€

8 Listed Products
Starting at
629€
Starting at
629€

8 Listed Products
Starting at
449€
Starting at
449€

7 Listed Products
Starting at
500€
Starting at
500€
7 Listed Products
Starting at
679€
Starting at
679€
7 Listed Products
Starting at
218€
Starting at
218€
6 Listed Products
Starting at
295€
Starting at
295€
6 Listed Products
Starting at
1,502€
Starting at
1,502€
6 Listed Products
Starting at
485€
Starting at
485€
5 Listed Products
Starting at
247€
Starting at
247€

5 Listed Products
Starting at
323€
Starting at
323€

5 Listed Products
Starting at
960€
Starting at
960€
5 Listed Products
Starting at
247€
Starting at
247€

4 Listed Products
Starting at
450€
Starting at
450€
4 Listed Products
Starting at
136€
Starting at
136€
3 Listed Products
Starting at
1,565€
Starting at
1,565€

3 Listed Products
Starting at
1,157€
Starting at
1,157€
3 Listed Products
Starting at
400€
Starting at
400€

3 Listed Products
Starting at
1,389€
Starting at
1,389€
3 Listed Products
Starting at
1,466€
Starting at
1,466€

3 Listed Products
Starting at
389€
Starting at
389€

3 Listed Products
Starting at
321€
Starting at
321€
3 Listed Products
Starting at
1,790€
Starting at
1,790€
2 Listed Products
Starting at
851€
Starting at
851€
2 Listed Products
Starting at
183€
Starting at
183€
2 Listed Products
Starting at
1,336€
Starting at
1,336€
2 Listed Products
Starting at
499€
Starting at
499€
2 Listed Products
Starting at
1,434€
Starting at
1,434€
2 Listed Products
Starting at
370€
Starting at
370€

1 Listed Products
Starting at
3,190€
Starting at
3,190€

1 Listed Products
Starting at
333€
Starting at
333€
1 Listed Products
Starting at
626€
Starting at
626€
As a priority: 3-4 levels of endurance, 2-3 of health, 2-3 of spirit, then Focus level 2 and 3, Keen Senses level 2 and 3, and Force Palm level 3. The rest can wait. These investments cover both your survival and offensive potential for the entire first half of the game.
The most effective way is to farm bandits and sell their loot. Robbing Hernand's bank earns you about 75 silver in 2 minutes if you have a mask and a key. You can also try the Duo (a game of chance on the tavern's second floor) or do bounties. Later, when you explore Déminis around chapters 8-9, pick up the banners on the spikes - they often worth a good amount of money.
Four methods: the main quests, the puzzles (the "?" on the map), free exploration (the altars at road intersections, identifiable with the Blinding Flash), and combat (the gauge on the left of the mini-map fills up by killing enemies). Sealed Artifacts must be unlocked by completing their associated challenge — check regularly in the dedicated menu if you have already met the conditions. And when a sealed artifact blinks in your inventory, it means the challenge is completed but you have not yet "used" the item to retrieve the core.
Yes, but it costs a Faded Abyss Core, and it's a quite rare resource. You can obtain it through certain sealed Abyssal Artifact challenges. So choose your skills with some thought — but if you really messed up, respec is available.
No. Push at least until chapter 5 before embarking on massive exploration. The game unlocks its mechanics progressively, and you risk wasting a lot of time trying to access content that simply isn't available yet. Make a few detours to pick up Artifacts along the way, but save full exploration for later.